Fitting guide
Tutorials
Want to install your stretch fabric by yourself? You absolutely can! Whether you’re a DIY enthusiast or simply curious, our detailed tutorials guide you step by step through the installation of your stretch ceiling or wall. You’ll learn how to choose the right profiles, position the fabric correctly, and use the proper tools to achieve a clean, custom finish. Thanks to our guides, installing your stretch fabric becomes simple and accessible, while improving both the look and acoustic comfort of your space.
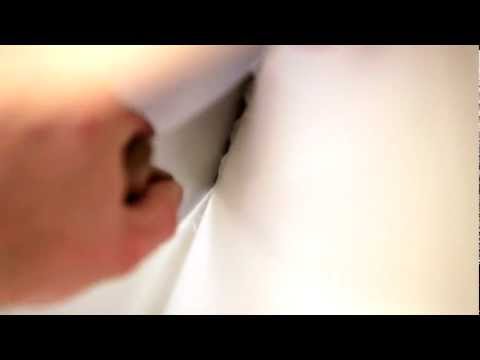
Proper spatula handling
Lorsque vous mesurez votre plafond ou votre mur, ne commandez jamais la toile aux dimensions exactes (dimensions « nettes »). Il faut toujours prévoir un peu plus grand (dimensions dites « brutes »).
Nous recommandons d’ajouter 10 cm aux dimensions réelles du plafond, soit :
- • + 10 cm en largeur
- • + 10 cm en longueur
Pourquoi ajouter cette marge ?
Parce qu’au moment de la pose, la toile doit être
insérée dans les profilés puis mise en tension.
Ces quelques centimètres supplémentaires
permettent de travailler plus facilement et
d’éviter de se retrouver avec une toile trop juste.
Ce surplus sera ensuite arasé à l’aide d’une paire
de ciseaux.
 Pour un plafond mesurant 300 × 400 cm, la toile à commander sera de 310 × 410 cm.
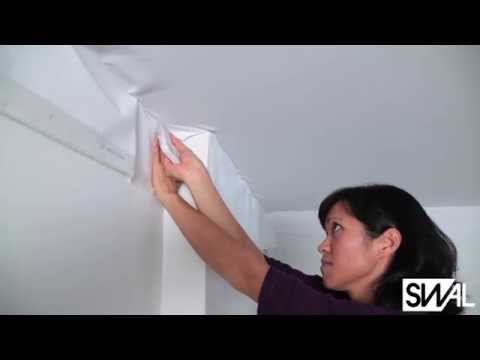
A two-step installation
You cannot properly tension a wall or ceiling by starting from one side and finishing on the opposite one. Installation must be done in two steps: positioning (appointing) and tensioning. This is essential to respect the straight-grain rule. A textile behaves like a mesh, with warp and weft threads. To achieve a perfectly stretched fabric, you must maintain the linearity of the weave (horizontal and vertical threads).
Positioning (appointing)
fitting-guide/pages/help_to_order.third_line.case_1
fitting-guide/pages/help_to_order.third_line.paragraph_one
fitting-guide/pages/help_to_order.third_line.paragraph_two
fitting-guide/pages/help_to_order.third_line.paragraph_three
fitting-guide/pages/help_to_order.third_line.paragraph_four
fitting-guide/pages/help_to_order.third_line.case_2
fitting-guide/pages/help_to_order.third_line.paragraph_five

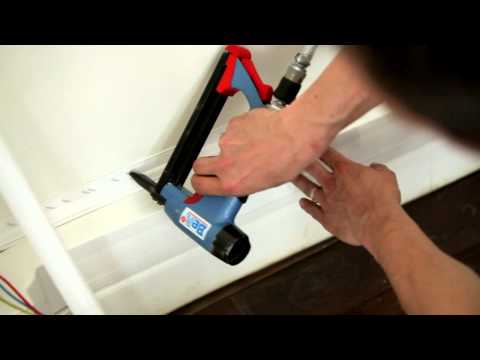
Tensioning
Now it is time to tension the fabric and complete the installation. Insert the fabric between each appoint by creating additional appoints between those already placed. During this step, pinch the fabric with your fingers while pushing it into the profile using the spatula. This ensures perfect tension. Then connect the appoints together. If ripples appear, simply undo a few previous appoints and reposition the fabric with greater tension.Trimming the excess
The excess fabric can now be trimmed directly with scissors or a cutter, using the profile as a guide to ensure a straight, clean cut. It can also be used to wrap the profile to create a faux-piping effect.Enjoy the acoustic benefits
Stretch fabrics naturally provide acoustic treatment thanks to micro-perforations and sound-absorbing materials behind them (waddings, foams, mineral wool, etc.).fitting-guide/pages/help_to_order.cta_shop.ready
fitting-guide/pages/help_to_order.cta_shop.title
fitting-guide/pages/help_to_order.cta_shop.paragraph

fitting-guide/pages/help_to_order.need_help.title
fitting-guide/pages/help_to_order.need_help.paragraph- +33 4 74 05 00 95
- swaldeco@swaldeco.com